
Introduction aux attributs d'événements HTML
Dans cet article, nous discuterons en détail des attributs d'événement HTML. Les événements sont les actions qui sont effectuées à la suite de l'action de l'utilisateur. Par exemple, lorsqu'un utilisateur appuie sur une touche d'un clavier pour lire les données, il s'agit alors d'événements de clavier. Ces activités sont effectuées lorsqu'un utilisateur consulte un site Web et effectue un clic sur le bouton ou lorsqu'une page se charge en appuyant sur le bouton d'actualisation lorsque le navigateur effectue des manipulations sur les pages, toutes ces actions sont considérées comme un événement. Ici, nous allons passer par une compréhension de base des événements et comment cela fonctionne dans le navigateur sur les actions de l'utilisateur. Il existe différents types d'événements qui se produisent dans toutes les fenêtres du navigateur et qui sont expliqués dans les sections suivantes.
5 principaux attributs d'événements HTML

Il existe une variante différente des événements disponibles dans le HTML. Et tous ces événements ont un petit bloc de code nommé comme un gestionnaire d'événements qui se déclenche lorsque l'action d'événement est effectuée. Ceux-ci sont attachés aux éléments HTML. Les gestionnaires d'événements ou les écouteurs d'événements jouent un rôle important dans les attributs d'événements HTML. Voyons différents types d'attributs d'événement qui sont déclarés globalement et appliqués aux éléments HTML ainsi que leur travail en détail. Quatre attributs d'événement principaux sont principalement utilisés. Elles sont:
- Événement de fenêtre
- Événements de formulaire
- Événements de souris
- Événements clavier
- Glisser-déposer des événements
Nous décrirons tous ces attributs un par un avec un exemple. Tout d'abord, nous irons avec.
1. Événement de fenêtre
- onafterprintEvent: cet attribut est pris en charge par toutes les balises Html et fonctionne lorsqu'une page a commencé à imprimer et possède un script à valeur unique. Voici un exemple de code HTML. Cet exemple montre lorsqu'un bouton est enfoncé, il imprime un message en cours d'impression dans une boîte de dialogue.
Code:
Windows onafterprint Event

Windows onafterprint Event
This attribute works in IE and Mozilla

function myfun() (
alert("Document is being printed");
)
Windows onafterprint Event
Windows onafterprint Event
This attribute works in IE and Mozilla
function myfun() (
alert("Document is being printed");
)
Windows onafterprint Event
Windows onafterprint Event
This attribute works in IE and Mozilla
function myfun() (
alert("Document is being printed");
)
Windows onafterprint Event
Windows onafterprint Event
This attribute works in IE and Mozilla
function myfun() (
alert("Document is being printed");
)
Windows onafterprint Event
Windows onafterprint Event
This attribute works in IE and Mozilla
function myfun() (
alert("Document is being printed");
)
Windows onafterprint Event
Windows onafterprint Event
This attribute works in IE and Mozilla
function myfun() (
alert("Document is being printed");
)
Production:

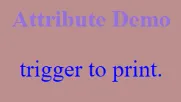
- onbeforeprint: Cela fonctionne avant l'impression. L'événement est déclenché après le processus d'impression. Voici l'exemple de code.
Code:
body (
color: #9370DB;
background-color: #BC8F8F;
text-align: center;
padding: 20px;
)
p (
font-size: 2rem;
)

Attribute Demo
body (
color: #9370DB;
background-color: #BC8F8F;
text-align: center;
padding: 20px;
)
p (
font-size: 2rem;
)
Attribute Demo
body (
color: #9370DB;
background-color: #BC8F8F;
text-align: center;
padding: 20px;
)
p (
font-size: 2rem;
)
Attribute Demo
body (
color: #9370DB;
background-color: #BC8F8F;
text-align: center;
padding: 20px;
)
p (
font-size: 2rem;
)
Attribute Demo
déclencheur pour imprimer.
fonction get () (
document.body.style.background = "# 00BFFF";
)
Production:
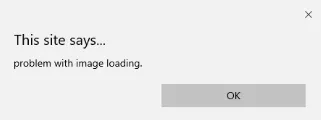
- onerror: Cette fonction est déclenchée lorsqu'une erreur est levée alors qu'aucun élément n'existe.
Code:

Bonjour le monde.
fonction myFun () (alert ("problème avec le chargement de l'image.");
)
Production:
- onload: Cette fonction aide à charger un objet et fonctionne bien pour voir si une page Web est correctement chargée.
Code:
onload event demo
function ldImg() (
alert("image loaded without error");
)
Production:

- onresize: cet événement est déclenché lorsque la fenêtre du navigateur est redimensionnée et n'importe quel élément peut être déclenché sous l'attribut resize.
Code:
onresize event
function cmg() (
alert('welcome to educba');
)
window.onresize = cmg;
onclick="alert(window.onresize);">
Production:

- onunload: cet événement est déclenché lorsqu'une fenêtre de page Web est fermée ou lorsqu'un utilisateur quitte la page Web. Le code ci-dessous décharge la page lorsqu'un utilisateur quitte et lance une alerte grâce à la recherche. Cet événement fonctionne parfois dans tous les navigateurs.
Code:
Welcometo educba tutorial
Welcometo educba tutorial
Welcometo educba tutorial
Quittez la page.
fonction onfunc () (alert ("Merci d'avoir cherché!");
)
Production:

2. Formulaire d'événements
Il fonctionne avec les contrôles de formulaire. Voici les attributs qui se produisent lorsque l'utilisateur interagit avec les navigateurs.
- onblur: cet événement se produit lorsque l'attention de l'utilisateur est éloignée de la fenêtre du formulaire. L'exemple suivant prend l'entrée en minuscules et lorsque le bouton d'envoi est cliqué, il transforme la sortie en majuscules.
Code:
Form onblur
body (
text-align:center;
)
h1 (
color:pink;
)

EDUCBA
onblur="myfunc()">
Submit
function myfunc() (
var a = document.getElementById("aaa");
a.value = a.value.toUpperCase();
)
Form onblur
body (
text-align:center;
)
h1 (
color:pink;
)
EDUCBA
onblur="myfunc()">
Submit
function myfunc() (
var a = document.getElementById("aaa");
a.value = a.value.toUpperCase();
)
Form onblur
body (
text-align:center;
)
h1 (
color:pink;
)
EDUCBA
onblur="myfunc()">
Submit
function myfunc() (
var a = document.getElementById("aaa");
a.value = a.value.toUpperCase();
)
Form onblur
body (
text-align:center;
)
h1 (
color:pink;
)
EDUCBA
onblur="myfunc()">
Submit
function myfunc() (
var a = document.getElementById("aaa");
a.value = a.value.toUpperCase();
)
Production:

- onchange: cet événement se produit lorsqu'un utilisateur modifie l'élément existant dans le formulaire. Cela se produit lorsqu'un élément perd le focus.
Code:
HTML onchange
select the dress color
pink
Yellow
White
Remarque: sélectionnez une option
Décrivez-vous en bref:Soumettre
Production:

- onfocus: cet attribut est activé lorsque l'utilisateur prête attention à l'élément sur une page Web ou lorsque la saisie est focalisée. L'exemple ci-dessous met en évidence lorsque nous saisissons une entrée dans le champ.
Code:
Cet événement est déclenché lorsqu'un élément est focalisé.
Nom:Emplacement:
fonction onfoc (a) (
document.getElementById (a) .style.background = "rose";
)
Production:
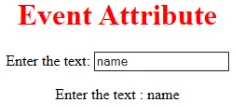
- oninput: cet événement se déclenche lorsque l'entrée est entrée dans le champ de saisie. Il est activé lorsque la valeur du champ de texte est modifiée. Il se reflète une fois que la valeur de l'élément est modifiée.
HTML oninput

body (
text-align:center;
)
h1 (
color:red;
)

Event Attribute
Enter the text:

function myon()
(
var x = document.getElementById("EDUCBA").value;
document.getElementById("sid").innerHTML = "Enter the text : " +x;
)
HTML oninput
body (
text-align:center;
)
h1 (
color:red;
)
Event Attribute
Enter the text:
function myon()
(
var x = document.getElementById("EDUCBA").value;
document.getElementById("sid").innerHTML = "Enter the text : " +x;
)
HTML oninput
body (
text-align:center;
)
h1 (
color:red;
)
Event Attribute
Enter the text:
function myon()
(
var x = document.getElementById("EDUCBA").value;
document.getElementById("sid").innerHTML = "Enter the text : " +x;
)
HTML oninput
body (
text-align:center;
)
h1 (
color:red;
)
Event Attribute
Enter the text:
function myon()
(
var x = document.getElementById("EDUCBA").value;
document.getElementById("sid").innerHTML = "Enter the text : " +x;
)
Production:

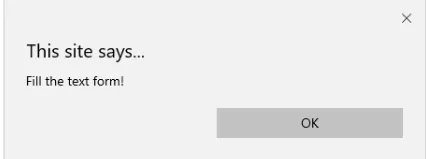
- oninvalid: cet attribut appelle les événements lorsque le texte saisi dans le type d'entrée n'est pas valide ou reste vide. Cet attribut d'événement doit remplir l'élément d'entrée.
Code:
example oninvalid Event
p (
color:orange;
)
body (
text-align:center;
)
HTML est utilisé pour créer une page Web
Entrez le nom:Production:
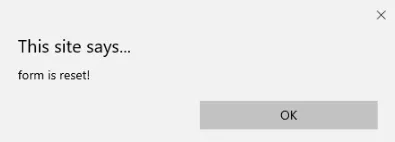
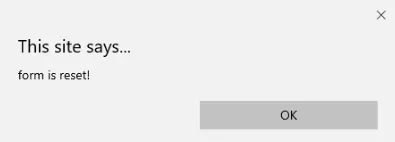
- onreset: il est déclenché lorsqu'un formulaire est au repos. L'exemple suivant indique que lorsque vous soumettez le bouton, un formulaire est traité et que lorsque vous cliquez pour réinitialiser, le formulaire est en cours de réinitialisation.
Code:
body (font-family:calibri;)
label (font-variant:small-caps;)
ol (background-color:#610000; margin-top:35px;)
li (margin-top:3px; padding:3px; background-color:rose; font-size:15px;)
div (position:absolute;top:250px;left:70px; font-size:1.5em;
)
Form with input to reset and submit
Enter input:
function onInva() (
alert("Input field cannot be empty!");
)
function onInp() (
var input_value = document.getElementById("iv").value;
document.getElementById("a_box").innerHTML = "Input value:
" + iv;
)
function onRes() (
alert("form is reset!");
)
function onSubmitEvent() (
alert("Form is loading");
location.reload();
)
Production:
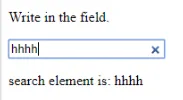
- onsearch: Cela fonctionne lorsqu'un utilisateur appuie sur un bouton Entrée.
Code:
Écrivez dans le champ.
fonction myF () (
var k = document.getElementById ("value1");
document.getElementById ("sample"). innerHTML = "l'élément de recherche est:" + k.value;
)
Production:
- onselect: il est déclenché lorsqu'un texte a été sélectionné dans une zone de saisie. Il ouvre une boîte de dialogue imprimant un message d'alerte.
Code:
onselect demo
h1 (
color:magenta;
)
body (
text-align:center;
)

function eduhtml() (
alert("text highlighted!");
)

EDUCBA Online tutorial
Text Box:
onselect demo
h1 (
color:magenta;
)
body (
text-align:center;
)
function eduhtml() (
alert("text highlighted!");
)
EDUCBA Online tutorial
Text Box:
onselect demo
h1 (
color:magenta;
)
body (
text-align:center;
)
function eduhtml() (
alert("text highlighted!");
)
EDUCBA Online tutorial
Text Box:
onselect demo
h1 (
color:magenta;
)
body (
text-align:center;
)
function eduhtml() (
alert("text highlighted!");
)
EDUCBA Online tutorial
Text Box:
Production:

- onsubmit: Le but de cet événement est d'exécuter l'action effectuée en appuyant sur le bouton de soumission.
Code:
Onsubmit Example
Enter name:
Email :
function myF() (
alert("The form was submitted");
)
Production:

3. Attributs du tableau clé
- OnKeyDown: il est déclenché lorsqu'un utilisateur appuie sur une touche fléchée vers le bas.
Code:
Exemple pour Onkeydown.
function mykedwn () (
alerte ("la touche est activée");
)
Production:
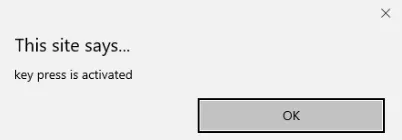
- OnKeyPress: cet événement est déclenché lorsque l'utilisateur appuie sur n'importe quelle touche du clavier. Remarque: certains navigateurs ne prennent pas en charge la pression d'une touche.
Code:
Cet exemple montre lorsqu'un utilisateur tape dans la zone de texte, il déclenche un événement
>Production:

- OnKeyUp: cet attribut est déclenché lorsqu'un utilisateur libère un curseur du champ de texte. Ci-dessous vient la démonstration.
Code:
Cet exemple transforme le caractère en minuscules.
Remplissez le nom:fonction mykey () (
var g = document.getElementById ("jjj");
g.value = g.value.toLowerCase ();
)
Production:

4. Attributs d'événements de souris
Cette action déclenche un événement de souris lorsque vous appuyez sur une souris à partir d'un ordinateur ou de tout périphérique externe comme un smartphone ou une tablette. Certains des événements de souris sont donnés ci-dessous:
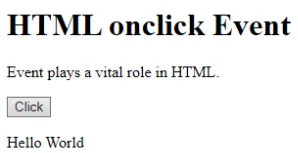
- onclick: il est déclenché lorsqu'un utilisateur appuie sur le bouton au-dessus de la souris. Un exemple d'entrée est donné ci-dessous pour montrer l'événement en cliquant sur la souris.
Code:
HTML onclick Event
HTML onclick Event
HTML onclick Event
L'événement joue un rôle vital en HTML.
Cliquez surfonction oncf () (
document.getElementById ("sample"). innerHTML = "Hello World";
)
Production:
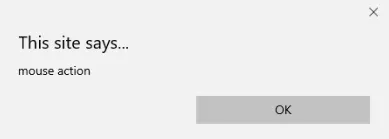
- onmousemove: il est déclenché lorsqu'une souris est déplacée sur une image dans n'importe quelle direction.
Code:
Event onmousemove demo
Cet événement est activé lorsque le pointeur fait glisser sa direction.
Exemple de texteProduction:
- Onmouseup: cet événement donne une notification lorsqu'un utilisateur relâche un bouton sur une sortie.
Code:
body (
color: "#ff0000";
height: 120vh;
background-color: #610000;
text-align: center;
)
.polygon (
float: right;
shape-inside: polygon(0 0, 0 200px, 100px 200px);
clip-path: polygon(0 0, 0 250px, 100px 300px);
height: 200px;
width: 200px;
background: linear-gradient(to bottom left, #7CFC00, #8B008B);
)
p (
margin: 30px auto;
)

HTML onmouseup Demo
cliquez sous l'objet
fonction mupFn () (document.querySelector ('. polygon'). style.transform = 'scale (2.2)';
)
Production:

- Onmouseover: exécuter un JavaScript lors du déplacement du pointeur de la souris sur une image
Code:
Example demonstrating Onmouseover.
Mouse over
function A() (
document.getElementById("sample").style.color = "yellow";)
function B() (
document.getElementById("sample").style.color = "green";
)
Example demonstrating Onmouseover.
Mouse over
function A() (
document.getElementById("sample").style.color = "yellow";)
function B() (
document.getElementById("sample").style.color = "green";
)
Example demonstrating Onmouseover.
Mouse over
function A() (
document.getElementById("sample").style.color = "yellow";)
function B() (
document.getElementById("sample").style.color = "green";
)
Example demonstrating Onmouseover.
Mouse over
function A() (
document.getElementById("sample").style.color = "yellow";)
function B() (
document.getElementById("sample").style.color = "green";
)
Production:

5. Faites glisser les attributs d'événement
Cette application aide dans la fenêtre HTML lorsque l'utilisateur fait glisser l'élément d'entrée. Vous trouverez ci-dessous les différents écouteurs d'événements utilisés en HTML pour stocker les données déplacées.
- Ondrag: Ceci est utilisé lorsqu'un élément est glissé depuis la page Web.
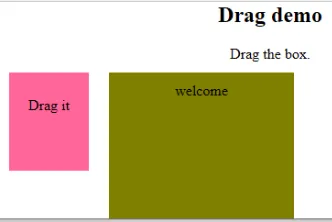
- Ondragstart : Cela se déclenche lorsque l'utilisateur commence à faire glisser depuis le champ de saisie. L'exemple ci-dessous montre comment faire glisser la zone à deux cibles.
Code:
#b1, #b2 (
float:left;padding:11px;margin:11px; -moz-user-select:none;
)
#b1 ( background-color: #FF6699; width:65px; height:85px; )
#b2 ( background-color: #808000; width:180px; height:180px; )

function dStart(e) (
e.dataTransfer.effectAllowed = 'move';
e.dataTransfer.setData("Text", e.target.getAttribute('id'));
e.dataTransfer.setDragImage(e.target, 0, 0);
return true;
)


Drag demo
Drag the box.
ondragstart = "return dStart(e)">
Drag it
welcome
Production:
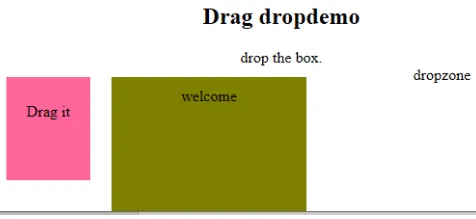
- ondrop: exécute cet attribut lorsqu'un élément déplaçable est déposé dans l'élément.
Code:
#b1, #b2 (
float:left;padding:11px;margin:11px; -moz-user-select:none;
)
#b1 ( background-color: #FF6699; width:65px; height:85px; )
#b2 ( background-color: #808000; width:180px; height:180px; )

function dStart(e) (
e.dataTransfer.effectAllowed = 'move';
e.dataTransfer.setData("Text", e.target.getAttribute('id'));
e.dataTransfer.setDragImage(e.target, 0, 0);
return true;
)


Drag dropdemo
drop the box.
ondragstart = "return dStart(e)">
Drag it
ondrop="drop(event)"
ondragover="allowDrop(event)">
welcome
dropzone
Production:
Conclusion
Cet attribut d'événement permet de rendre une application Web très simple et attrayante. L'occurrence différente des actions génère divers événements. Même si cette approche est généralement évitée, mais le programmeur aime apprendre la fonction affectée aux événements d'attributs HTML, et ces gestionnaires d'événements sont toujours exécutés pour embellir les pages Web.
Article recommandé
Ceci est un guide des attributs d'événement HTML. Nous discutons ici de l'introduction aux attributs d'événement HTML ainsi que de l'implémentation et de la sortie du code. vous pouvez également consulter nos articles suggérés pour en savoir plus -
- Brève introduction aux cadres HTML
- Modification d'un attribut de style HTML
- Applications du HTML | Top 10 des utilisations
- 10 meilleures différences HTML vs HTML5 (infographie)
- Lancer vs lancer | Les 5 principales différences que vous devez savoir
- Définir une couleur d'arrière-plan en HTML avec l'exemple